Your Roadmap to Rooftop Solar at Home

Today we dive into home rooftop photovoltaic installation and permitting, guiding you from first sketch to final inspection. Expect practical steps, safety insights, code alignment, and real-world examples that demystify decisions about hardware, interconnection, incentives, and inspections, so your household can harvest sunlight confidently, safely, and affordably.

Before You Drill a Single Hole

Hardware That Works Together

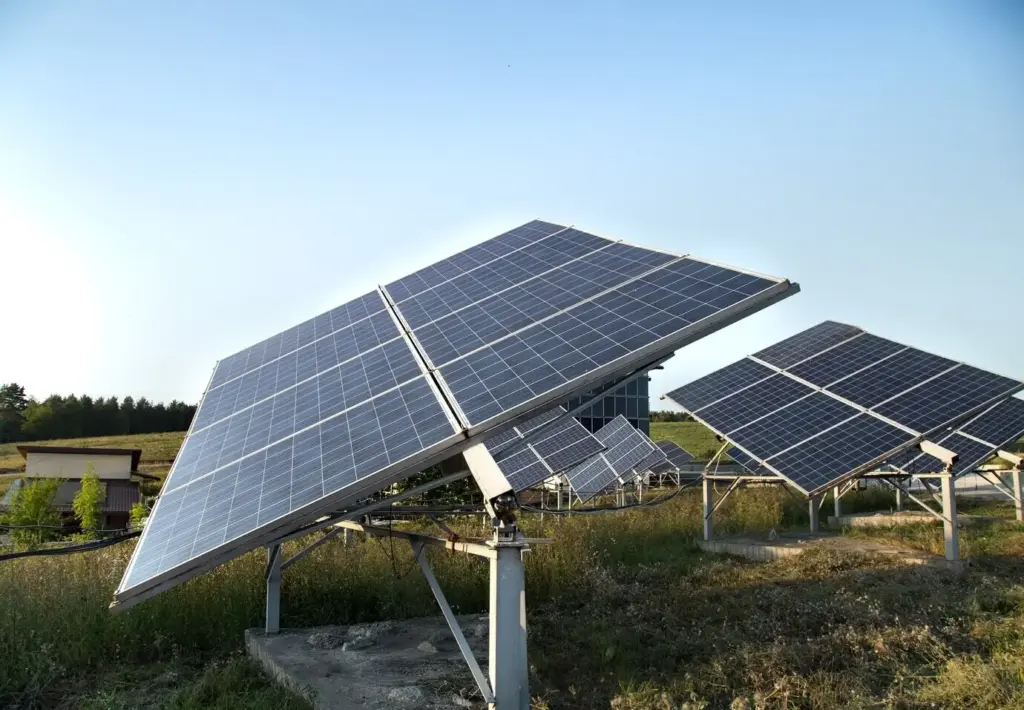
Choose Modules for Climate and Space

High-efficiency monocrystalline panels can maximize output on smaller roofs, while bifacial modules may help in reflective environments. Validate certifications, temperature coefficients, and mechanical load ratings against local snow, hail, and wind conditions, and ensure the manufacturer’s warranty aligns with your long-term expectations and financial modeling.

Match Inverters to Shading Reality

String inverters with optimizers excel on moderate shading and lower costs, while microinverters isolate module-level performance, boosting resilience to complex shade. Confirm rapid shutdown compliance, monitoring features, warranty coverage, and serviceability. Design strings within voltage limits across seasonal temperatures for efficient, safe, code-compliant operation.

Racking, Flashing, and Wire Management

Your mounting system must respect roof geometry, material, and uplift forces. Use tested flashing for watertight penetrations, ensure proper torque and embedment, and choose corrosion-resistant hardware. Plan conductor paths, drip loops, and strain relief to minimize abrasion risks and keep maintenance simple and visually tidy.

Permits, Plans, and Approvals

Clear, accurate documentation accelerates approvals. Understand local building, electrical, and fire codes, then tailor your plan set to those standards. Coordinate with the utility for interconnection and net metering. When drawings address reviewers’ questions upfront, approvals move faster and inspections become routine rather than stressful.

Installation, Step by Step

Layout and Attachments

Snap straight lines, locate rafters accurately, and pre-drill to avoid splintering or missed members. Use sealant compatible with roofing materials, then install flashed mounts per manufacturer specifications. Verify spacing and alignment before rail installation, remembering thermal expansion, drainage, and space for safe, comfortable maintenance access later.

Electrical Routing and Protection

Secure conductors beneath modules away from abrasion points, create drip loops, and protect roof penetrations with grommets or fittings. Size conductors for voltage drop and temperature rating, use proper overcurrent protection, and ensure grounding or bonding meets code, including rapid shutdown and labeling where required.

Commissioning and Documentation

Before energizing, check torque, verify polarity, and confirm voltage against expected values. Update as-built diagrams, record serial numbers, and activate monitoring. Photograph labels and equipment locations for future reference. A clean commissioning package delights inspectors and simplifies warranty claims if issues arise years from now.

Safety is Not Optional

Working at height and with electricity demands disciplined controls. Plan fall protection, ladder placement, and weather monitoring. De-energize circuits where possible, lock out breakers, and communicate clearly. A safety-first culture protects crews, homeowners, and neighbors while keeping schedules and budgets intact throughout the project’s lifecycle.

Fall Protection Done Right

Use proper anchor points, lifelines, and harnesses, and inspect gear before every shift. Keep work areas clean of loose hardware that can roll underfoot. Train spotters for ladder safety and weather awareness, and pause work during gusty winds or wet conditions that increase slip and trip risks.

Electrical Awareness at Every Step

Even daylight can energize modules, so use covers when appropriate, verify absence of voltage, and never rely solely on labels. Respect arc flash boundaries, secure conductors, and confirm grounding continuity. Good habits prevent injuries, protect equipment, and ensure your inspection day is predictable rather than nerve-wracking.

Weatherproofing and Fire Considerations

Follow manufacturer instructions for flashing, sealants, and clearances to protect the roof’s integrity. Maintain fire setbacks, secure conductors away from sharp edges, and label equipment per code. Proper spacing around equipment aids firefighters and helps mitigate risks during extreme heat, heavy snow, or wind-driven rain.

Costs, Incentives, and Payback

Smart financing begins with a transparent budget. Align equipment choices with warranties and expected production, then layer incentives like tax credits, rebates, and renewable energy certificates. Model utility tariffs across seasons and escalation rates to understand payback, cash flow, and how storage might affect value streams.

Living With Solar: Monitoring and Care

Once energized, your array becomes a quiet partner. Monitoring helps you spot issues early, while simple maintenance preserves output year after year. Build a rhythm for inspections, track performance seasonally, and keep warranty paperwork handy so any hiccup becomes a manageable, well-documented service request.

Community, Learning, and Next Steps

Barbercustomhomes
Privacy Overview

This website uses cookies so that we can provide you with the best user experience possible. Cookie information is stored in your browser and performs functions such as recognising you when you return to our website and helping our team to understand which sections of the website you find most interesting and useful.